Stand back. This is gonna get messy.
Since it's just about the end of cherry season, you might (or might not) want to preserve some as jam.
But unlike shucking fresh peas, which recipes blissfully suggest that you do while reminiscing with old friends while sitting on vintage rocking chairs that you bought at a barn sale on your front porch watching the laundry dry in the Hamptons with iced tea and fresh-baked snickerdoodles, pitting cherries needs to be safely done in the kitchen away from anything upholstered or Armani.

So I'm going to teach you how to make something without a recipe.
Before you freak, remember that your grandmother made lots of things without recipes, before Food Network and Martha and food magazines that preach measuring everything down to the last 5/9ths of a teaspoon. Just breath. That's right, it will be okay.

No-Recipe Cherry Jam
Buy as many cherries as you feel like pitting.
Usually I have the patience for about 3 pounds, but it's up to you. Figure one pound of cherries will make one good-sized jar of jam. Plump, dark Bing cherries work really well, although Burlatts are good, and if you can find sour cherries, your jam will rock.
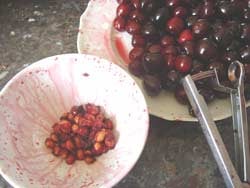
Wear something red. Or black. Rinse the cherries and remove the stems. Using the handy cherry pitter that I told you to buy a few weeks ago and pit the cherries. Make sure to remove all the pits since everyone is so litigious these days. Chop about ¾ of them into smaller pieces, but not too small. Leave some cherries whole so people can see later on how hard you worked pitting real cherries. If you leave too many whole ones, they'll tumble off your toast and stain your pajamas.
Cook the cherries in a large non-reactive stockpot. It should be pretty big since the juices bubble up. Add the zest and juice of one or two fresh lemons. Lemon juice adds pectin as well as acidity, and will help the jam gel later on. See how smart I am?
Who says I'd never amount to anything?
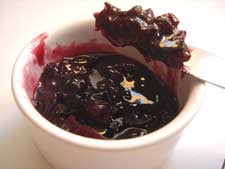
Cook the cherries, stirring once in a while with a heatproof spatula, until they're wilted and completely soft, which may take about 20 minutes, depending on how much heat you give them. Aren't they beautiful, all juicy and red?

Once they're cooked, measure out how many cherries you have (including the juice.) Use 3/4 of the amount of sugar. For example if you have 4 cups of cooked cherry matter, add 3 cups of sugar. It may seem like a lot, but that amount of sugar is necessary to keep the jam from sprouting green whiskers after a few weeks in the refrigerator.
Stir the sugar and the cherries in the pot and cook over moderate-to-high heat. The best jam is cooked quickly. While it's cooking, put a small white plate in the freezer. In spite of the fact that you may need to use the bathroom or lower the volume on Judge Judy when she screams her verdicts, remain pretty vigilant and stir the fruit often with a heatproof utensil. Wouldn't it be a shame to burn it at this point? Scrape the bottom of the pot as you stir as well.
And no matter how good they look, resist popping a warm cherry into your mouth. They are really hot, take it from me, and you will burn your mouth. Yes, take it from me. Ouch! It hurts.
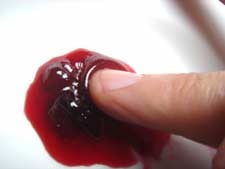
Once the bubbles subside and the jam appears a bit thick and looks beginning to gel, (it will coat the spatula in a clear, thick-ish, jelly-like layer, but not too thick) turn off the heat and put a small amount of jam on the frozen plate and return to the freezer. After a few minutes, when you nudge it if it wrinkles, it's done.

If not, cook it some more, turn off the heat, and test it again. If you overcook your jam, the sugar will caramelize and it won't taste good and there's nothing you can do. Better to undercook it, test it, then cook it some more.
Are you beginning to understand why all those gourmet jams are expensive?

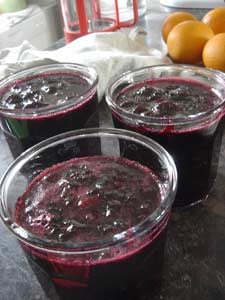
Once it's done and gelled, add a bit of kirsch if you have it, clear cherry eau-de-vie which will highlight the flavor. Or add a few drops of almond extract, but not too much, or it will taste like a cheap Italian cake. Ladle the warm jam into clean jars and cover. Cool at room temperature, then refrigerate.
See, you did it!
No comments:
Post a Comment